How to Make the Best Use of Your Contact Center Dashboard
by Shaundalee Carvalho | Published On May 10, 2021

On Wednesday, April 21st, ComputerTalk presented our April Slice of ice webinar: Navigating iceMonitor 11. In this session, Training and Documentation Specialist Kathika Uthayakumar provided an overview of iceMonitor 11, discussed the new grid view and iceMonitor settings, and provided some helpful tips.
Navigating iceMonitor 11 Slice of ice Recap
Click here to watch the full recording of the session.
Overview
iceMonitor is a tool that provides access to real-time information about your contact center. It allows you to monitor your queues, users, and teams. The latest update, version 11, offers more information and statistics than previous versions.
iceMonitor 11 is still accessed through the iceManager website. However, unlike previous versions, it can be accessed through any internet browser, including Internet Explorer, Chrome, Firefox, and Safari. Log in using your ice credentials, then click the iceMonitor tab at the top of the page to access it.
Dashboard Display Settings
The new iceMonitor dashboard looks different than in previous versions. In particular, it now consists of grids instead of tiles, allowing users to see more information at once. The grids show all available contact center data by default.
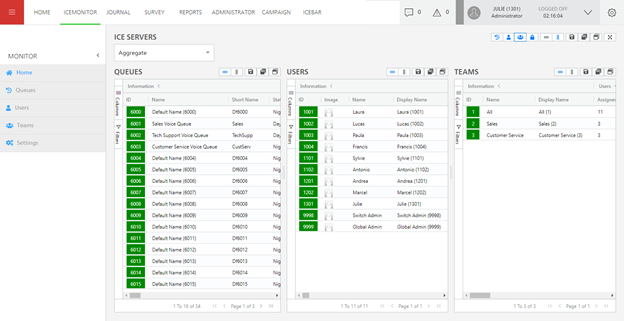
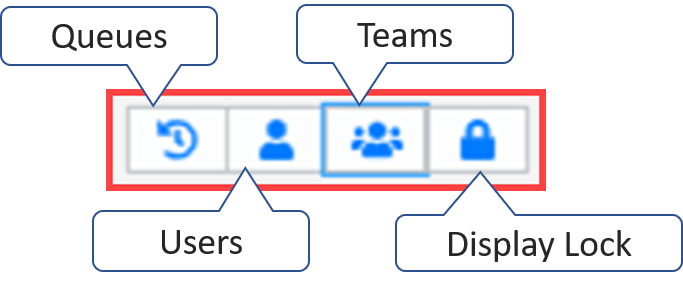
However, you can use the first three buttons in the grid display settings to control which sections – Queues, Users, and Teams - are visible. The Display Lock button can be used to lock the default order of the grids.
The next two buttons in the display settings can be used to control the orientation of the grids. Click the vertical bars icon to display the grids next to each other or click the horizontal bars to display them one above the other.
After configuring a view you’re happy with, you can use the Save button to save it as either a private view or a shared view if you wish to let other users see the same one.
The next time you use iceMonitor, you can select a layout using the Restore button. You can click the Reset button to change the layout back to default settings.
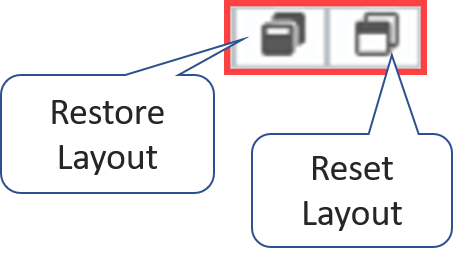
Note that each grid has its own set of Save, Restore, and Reset options as well, so you can configure your preferences for individual grids.
The last button in the display options is the Full Screen button, which you can use to hide the banners on the top and left side of the page.
Grid View
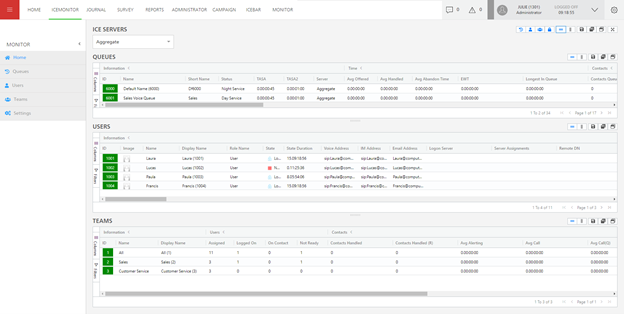
The new iceMonitor displays more information about users in the new grid view, including name, role, and connection address. Columns of information are now grouped, with the group name displayed in the first row of the grid. These groups – such as Information, State Time, and Calls – can be expanded or collapsed to show or hide the corresponding sets of columns.
The Columns tab on the left allows you to configure which columns to display, while the Filters tab allows you to configure which rows to display. For example, you may decide to use the Filters to hide logged off users. Thresholds are now shown in the background color of the ID. By default, green means no threshold has been met, while orange means a warning threshold, and red means a critical threshold has been met.
You can access the Actions menu by moving your cursor to the right corner of any column and clicking the hamburger button.
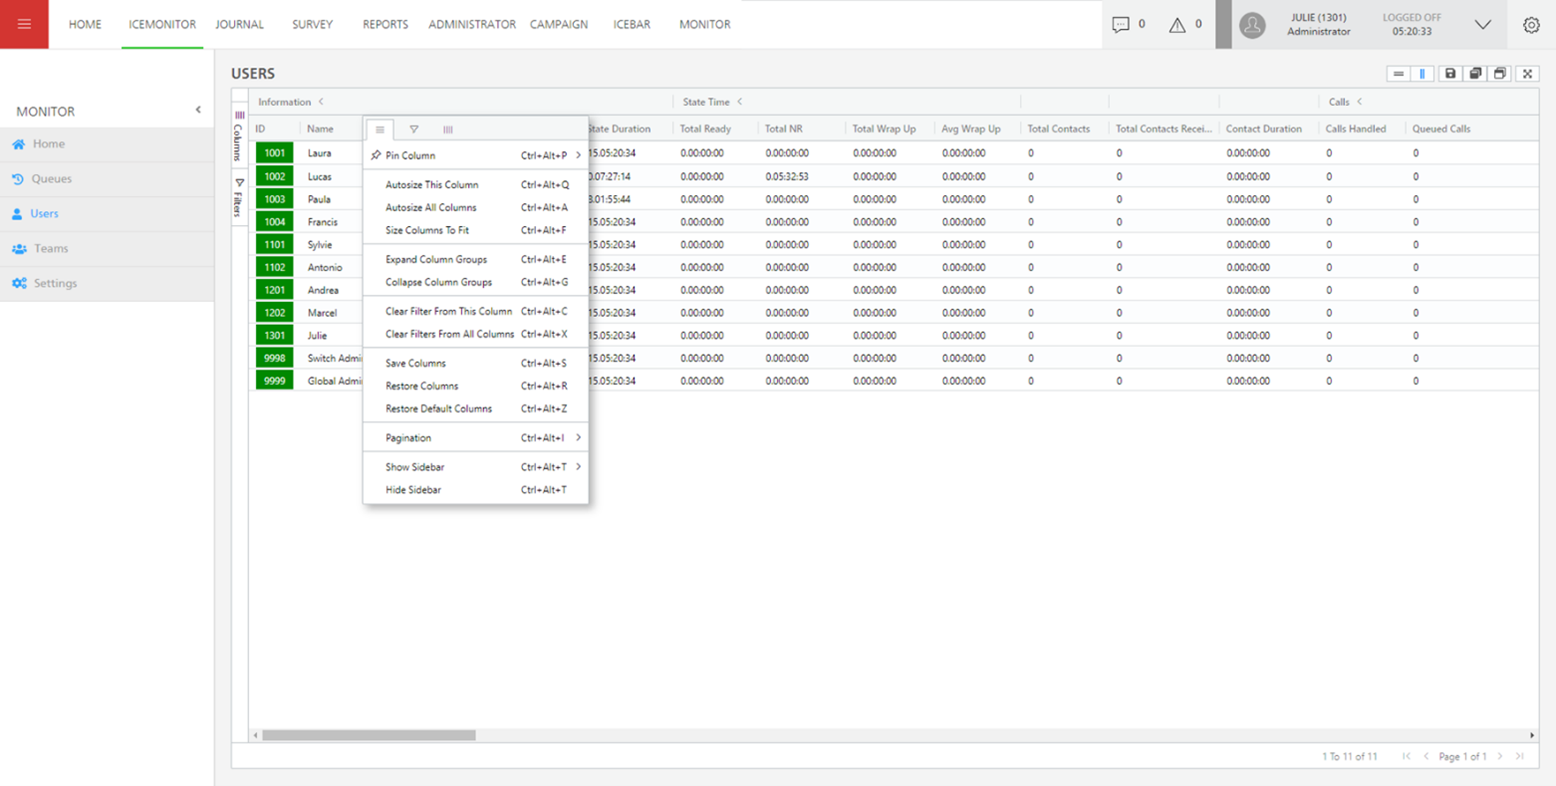
This menu allows you to pin columns to the left or right side of the grid; adjust column widths; expand and collapse column groups; clear filters; save, restore, and reset columns; adjust pagination to change the number of rows shown; and show or hide the Columns and Filters tabs.
The information shown in the detail grid is similar to previous versions, but it is now displayed in table form. The detail grid for a user shows all available information for the user across its five tabs. This includes profile information and statistics, contacts handled, user’s activities, and queue and team assignments. There are new statistics included that are related to multi-contact handling, which was enhanced in ice version 11. The detail grid also has a new button that allows you to close it, which was not available in previous versions but was desired by many.
Since each grid has its own set of display options, the detail grid, like others, can be displayed horizontally or vertically, and layouts can be saved, restored, and reset.
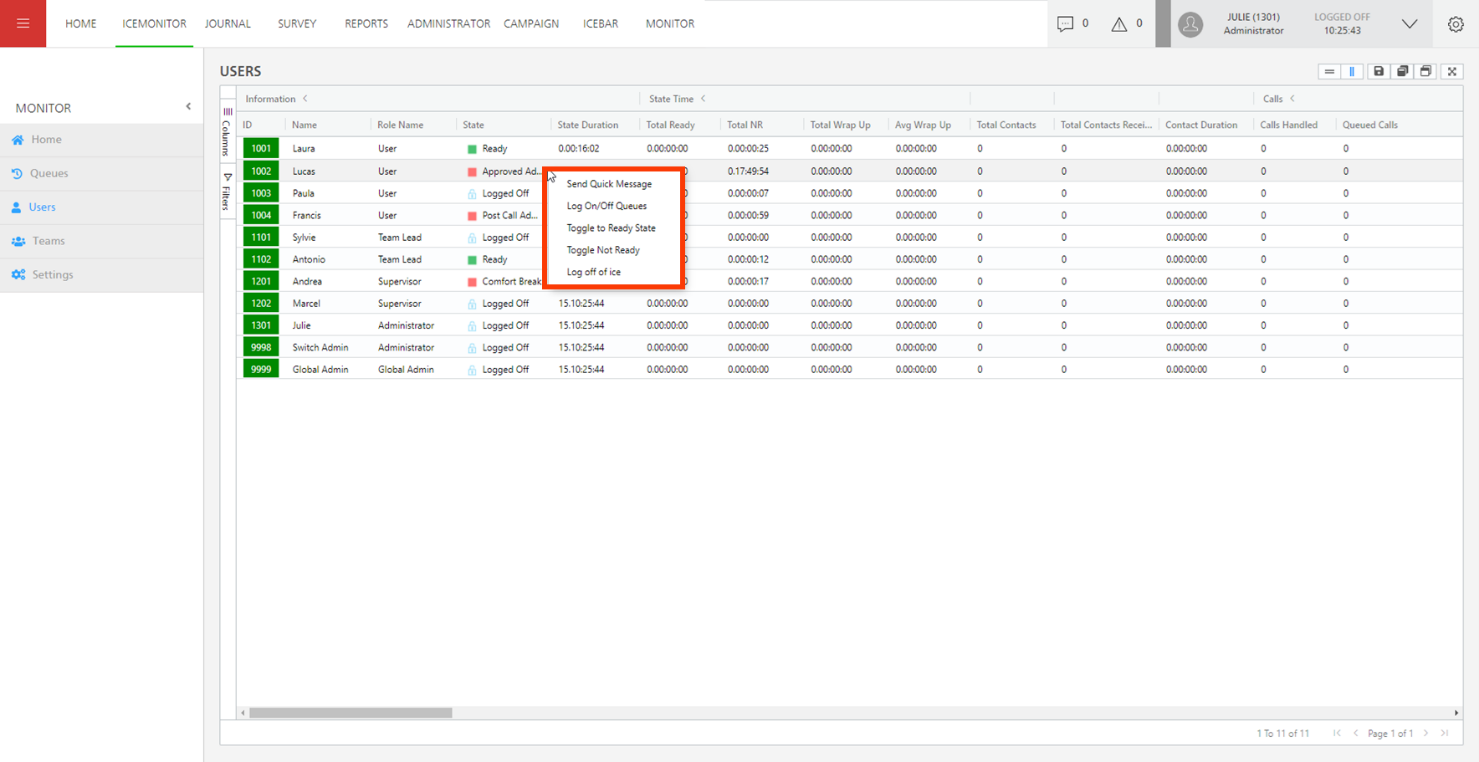
Right-clicking on a logged-on user opens a menu similar to previous versions of the right-click menu. The menu provides options to message the user, toggle their state, or use the Silent Monitoring feature (depending on your permissions and state).
iceMonitor Settings
In the new version of iceMonitor, the Display Settings page has options condensed into five settings.
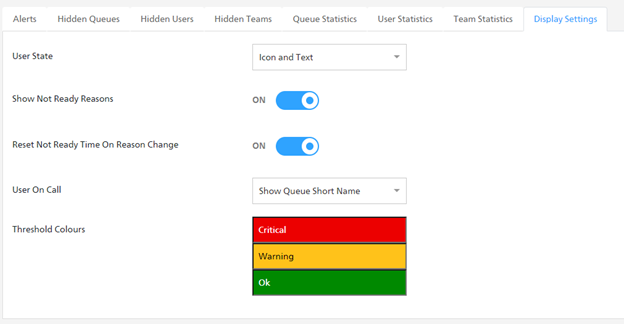
These settings allow you to change how a user’s state is displayed; whether Not Ready reasons are shown; whether Not Ready time is reset when the reason is changed; what information is shown when a user is on a call; and which colors are used to indicate different thresholds.
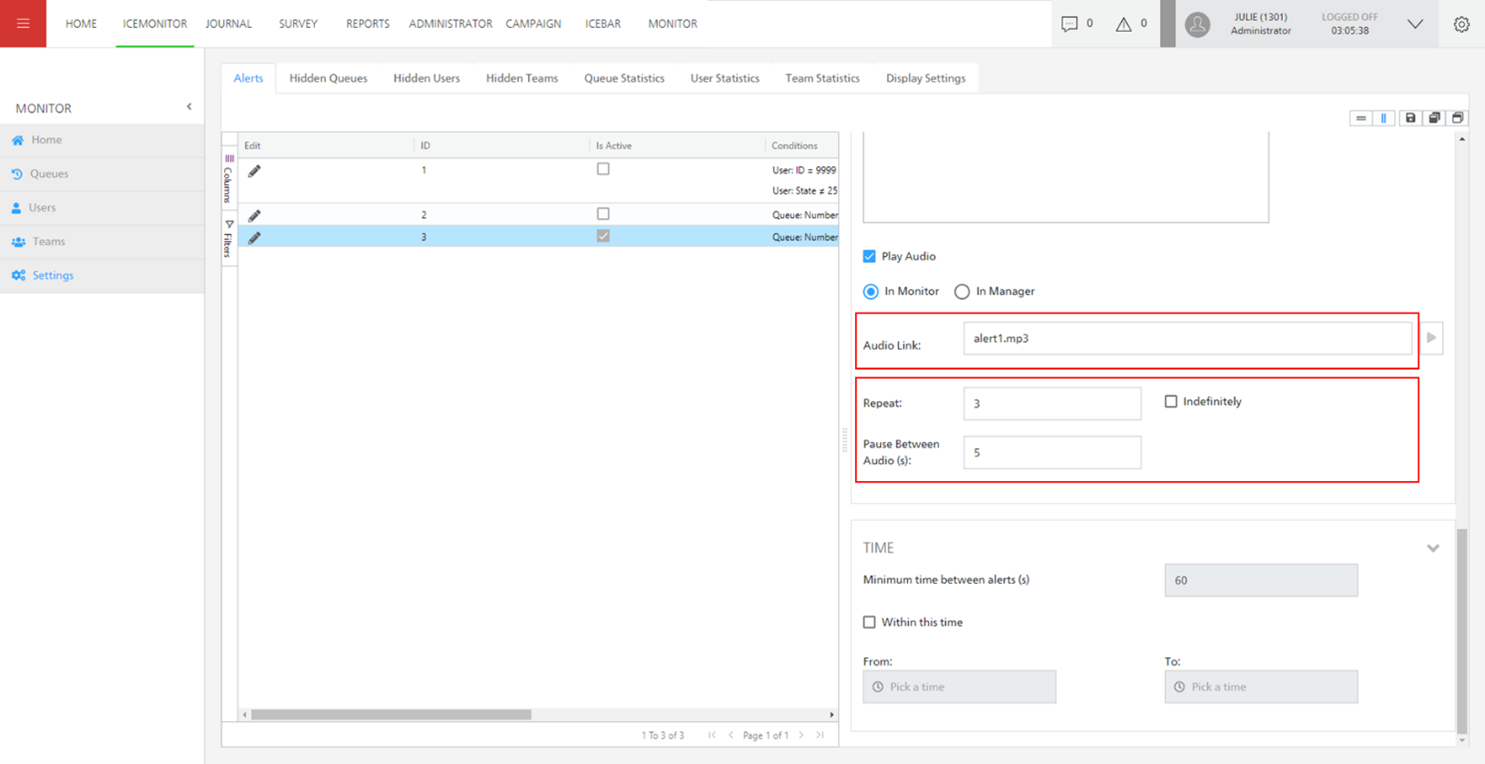
In past Slice of ice sessions, we’ve discussed how to create new iceMonitor alerts. ice versions 9 and higher have a new type of alert called a webhook alert. This type allows you to receive the alert as a Microsoft Teams channel notification. Watch the recording of this session to see an example of how to set up a webhook alert (example begins at 18 minutes). There is also a handout on the training website to help you. It includes information on where to find the Teams Channel Webhook URL, how to setup the Message field, and more.
The latest ice versions allow you to set up audio alerts as well. To do this, audio files must be placed onto the server and then the URL or directory location to the audio file must be added in the Audio Link field. There are three default audio alerts available on the server to use. You will also have to configure the number of times you want the alert to repeat. Audio alerts are especially helpful when you have iceMonitor open on a secondary monitor or are not actively looking at the tool.
If you would like to learn more about iceMonitor 11 and how you can upgrade, please contact your account owner or request a demo.
Our next Slice of ice session, Security & Standards – Mitigating Security Risks, will take place on May 19th. Click here to register.
More from our blog
 We’re super excited to share that we’ll be attending Enterprise Connect 2025 this March! As a leading contact center provider, we’re thrilled to join the ultimate event for communication and collaboration technology. Stop by our booth #1230 to discover...
 There’s been a lot of buzz around artificial intelligence (AI) in recent years. Many organizations are already investing in it or considering investing in it in the future. Naturally, they want to know what kind of financial returns they can...
 Markham, ON — We did it! ComputerTalk scoops top honors in the 2024 UC Awards celebration, winning Best Microsoft Contact Center Solution!
