Featured
Slice of ice Recap: Introducing ice Contact Center 13
by Nicole Robinson | Published On April 25, 2024

On Wednesday, April 17, 2024, ComputerTalk presented our latest version of ice Contact Center, ice 13, in our Slice of ice session.
Click here to watch the complete recording or read on for a summary.
Overview
At ComputerTalk, we take an agile and responsive approach to our releases and place a strong importance on customer feedback and market demands. We strive to enhance customer service, improve agent productivity, and optimize your operations.
During our Slice of ice session, we covered the 4 main enhancements in our latest version of ice:
- Contact attachments: Effortlessly share files, documents, and images with customers.
- Journal enhancements:
- LOB information: You can easily find the interaction you are looking for by searching for a specific LOB code in iceJournal.
- Journal exports: Further analyze interactions with iceJournal CSV exports.
- Email support for additional participants: Agents and customers can add additional recipients to emails in either the To or CC field for enhanced visibility or further information.
- Screen recording in wrap-up: Ensure agents are following standard procedures during wrap-up by extending screen recording to continue during the wrap-up state.
Chat attachments
Chat attachments allow you to easily share files, documents, and images with customers.
Sending a file
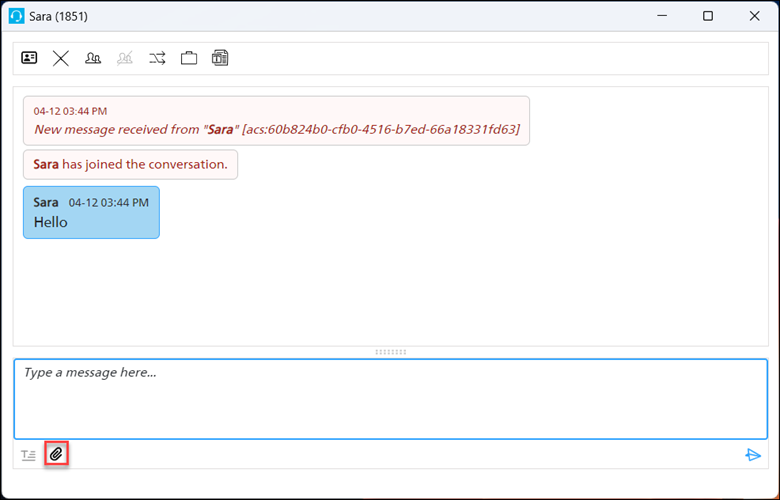
You can enable settings to allow agents and customers to send their file attachments as links in the conversation.
Steps to attach a file:
- Click on the attachment button (This loads your computer’s file explorer).
- Select the file you would like to send.
- The file becomes available in the chat to the agent and the customer as a link.
You can send files, images, or any other approved file type. The list of approved file types is configurable based on the file types you’d like to be able to send and receive.
Viewing past attachments
You can view the chat attachments after the conversation is completed in iceJournal. A new filter for attachments allows you to see all contacts with attachments.
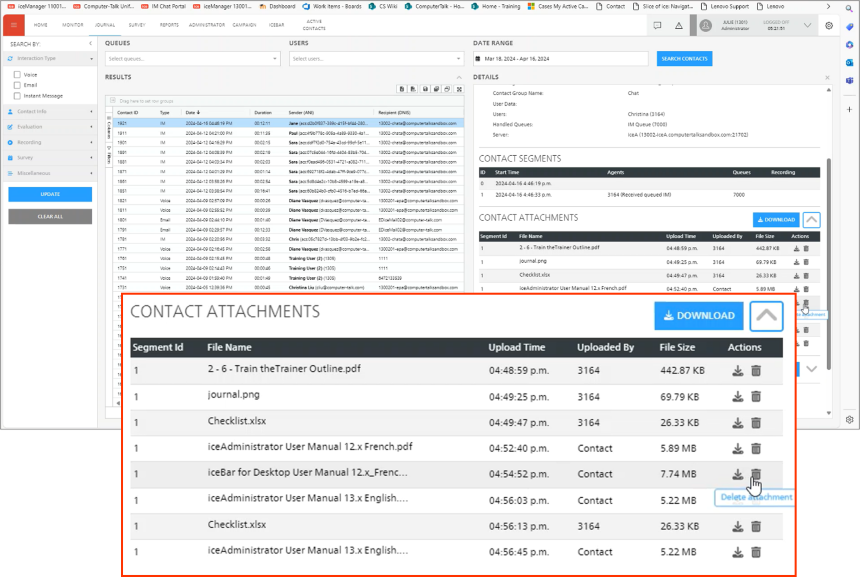
Steps to view past attachments:
- Search for the contact in iceJournal.
- Click on the contact.
- Note: you will see that there's a new section for contact attachments specifically.
- Click on the attachments section. You will see all of the contact attachments that were uploaded during the contact, and some additional details.
You can see the segment ID (telling you which segment the attachment was uploaded in), the file name, the upload time, who it was uploaded by, whether it was the agent or the customer, and the file size. There are additional actions that allow you to download individual files and allow administrators to delete attachments.
When you click download, you can download the individual file and review it. If you'd like to download all the attachments, click on the blue download button to download a zip file.
Contact attachments follow the same permissions as segmented call recordings. For example, a team lead can access the attachments for any users assigned to their team, a supervisor can access the attachments for any user who they share a common queue with, and administrators have access to all attachments.
Enabling and disabling attachments
For agents:
- Go to settings in iceManager.
- Under Administration on the left, select Configuration groups on the left.
- Under the icePhone tab, enable the “allow contact attachments from agent” setting to allow agents to upload files. Alternatively, disable this if you don’t want agents to send files.
For customers:
- Go to chat destinations.
- Under allow contact attachments from web user, toggle this setting to on to enable attachments. You can also disable this for customers.
Journal enhancements – LOB codes
Easily find the interaction you are looking for by searching for a specific LOB code in iceJournal.
A new filter in iceJournal for LOBs allows you to filter your search results based on the LOB code assigned.
- Select the LOB search selector on the right-hand side.
- Choose your codes and submit them.
- Alternatively, you can enter them manually by typing the LOB search selector.
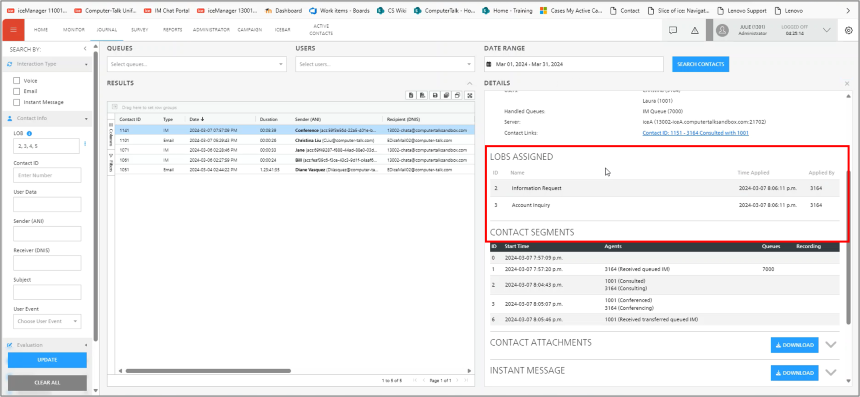
There is also a new LOB column in the search results grid itself. When you click on a contact, you can see that there is a new LOB section with information about the code assigned, the name of the LOB code, the time that it was applied, and the agent ID of the person who applied the code.
Journal search – filter LOB codes setting
A new setting in configuration groups affects the information displayed in iceJournal.
Steps:
- Go to settings in iceManager.
- Under Administration on the left, select Configuration groups.
- Select LOB tab.
- Journal Search – Filter LOB Codes
- Enabled - journal filter will only show LOBs assigned to users
- Disabled - will show all LOBs, including deactivated and those that aren't assigned to users.
Journal enhancements – export
Further analyze interactions with iceJournal CSV exports.
iceJournal has been updated to use the same grids as iceMonitor. Before exporting your results, you’ll want to configure your search grid. You can remove columns and filter rows based on the information you'd like to see displayed in the export.
We have two new buttons at the top, with two options: export to Excel and export to CSV.
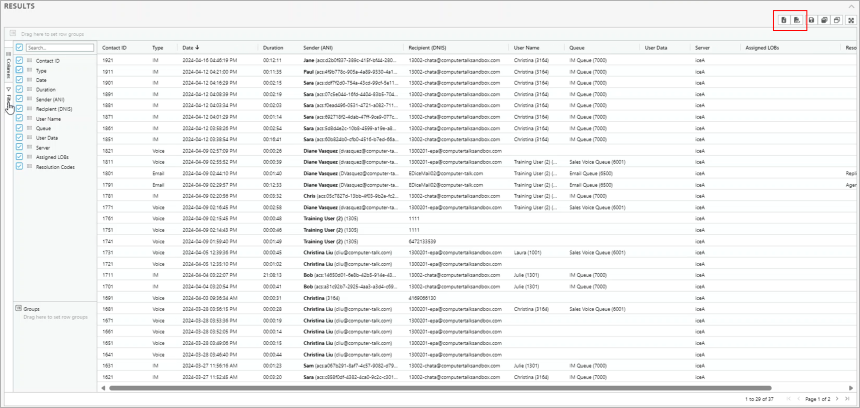
The export will depend on your grid layout. It'll only show contacts and columns that are visible in your grid.
Email enhancements – additional participants
Enable agents and customers to add additional recipients to emails on either the To or CC field for enhanced visibility or further information.
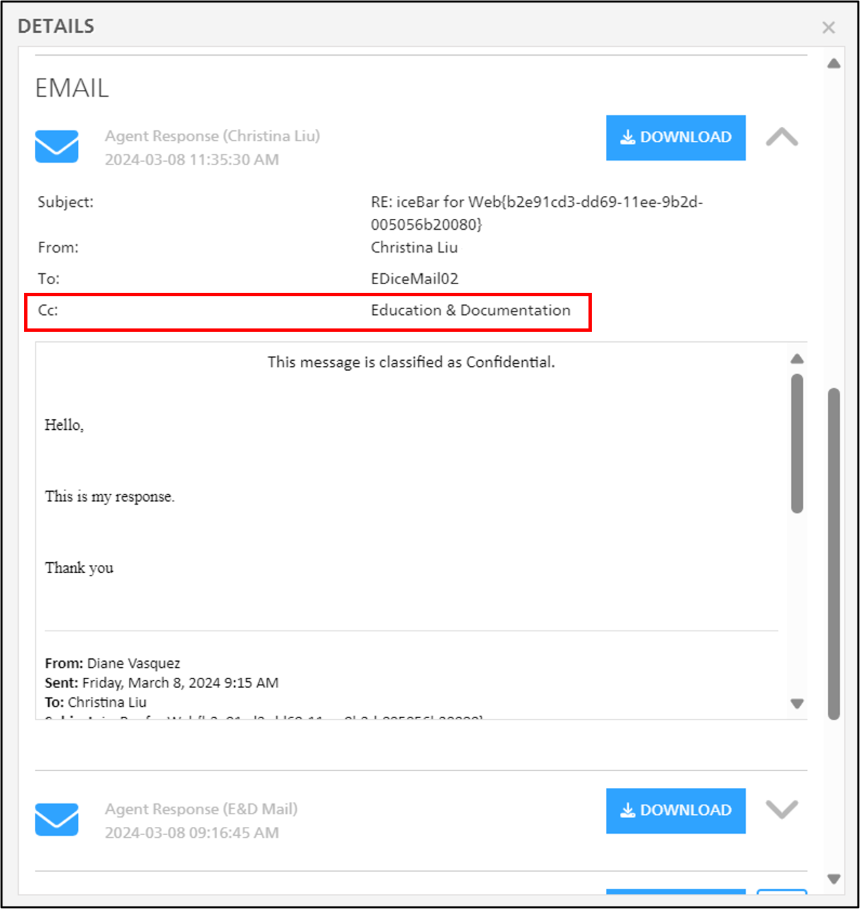
With ice 13, there's support for multiple recipients in the To and CC fields. Email handling from an agent's perspective is largely the same but if the customer has added an additional participant, ice will be able to track and retain that information when the agent responds.
Similarly, if the agent has included a subject matter expert on the response, it will be tracked through ice.
Screen recording in wrap-up
Lastly, we’ll cover screen recording in wrap-up.
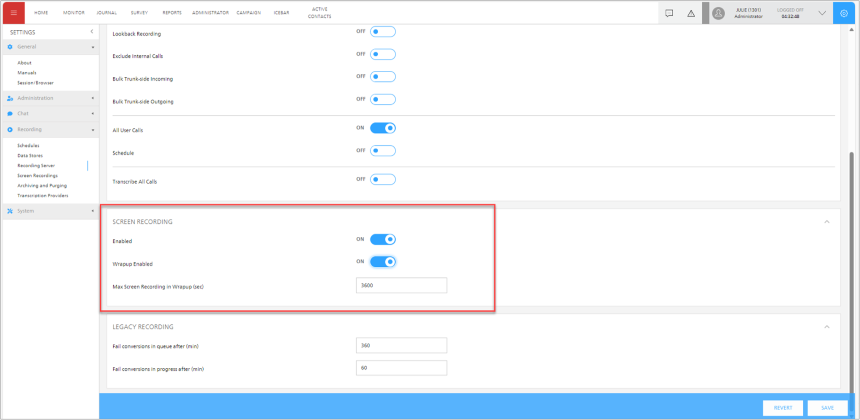
If you have screen recording enabled, you also have the option to continue recording when the agent is in wrap-up. This allows you to ensure that agents are following standard procedures during wrap-up by extending screen recording.
Steps to enable screen recording in wrap-up:
- Go to settings in iceManager.
- Under Recording on the left, select Recording Server on the left.
- Under Screen Recording, select Wrapup Enabled to turn on screen recording in wrap-up.
- Under Max Screen Recording in Wrapup (sec), you can configure the amount of time for wrap-up. The value is in seconds and the default is 1 hour (3600 seconds).
Conclusion
ComputerTalk is excited about our latest version of ice Contact Center. With ice 13, you will be able to:
- Effortlessly share files, documents, and images with customers.
- Easily find the interaction you are looking for by searching for a specific LOB code in iceJournal.
- Further analyze interactions with iceJournal CSV exports.
- Enable agents and customers to add additional recipients to emails on either the To or CC field for enhanced visibility or further information.
- Ensure agents are following standard procedures during wrap-up by extending screen recording to continue during the wrap-up state.
If you want to implement or upgrade to ice Contact Center 13, contact your account owner or us here.
More from our blog
 In the healthcare space, contact centers are crucial to bridging the gap between service providers and patients seeking support, information, or guidance.
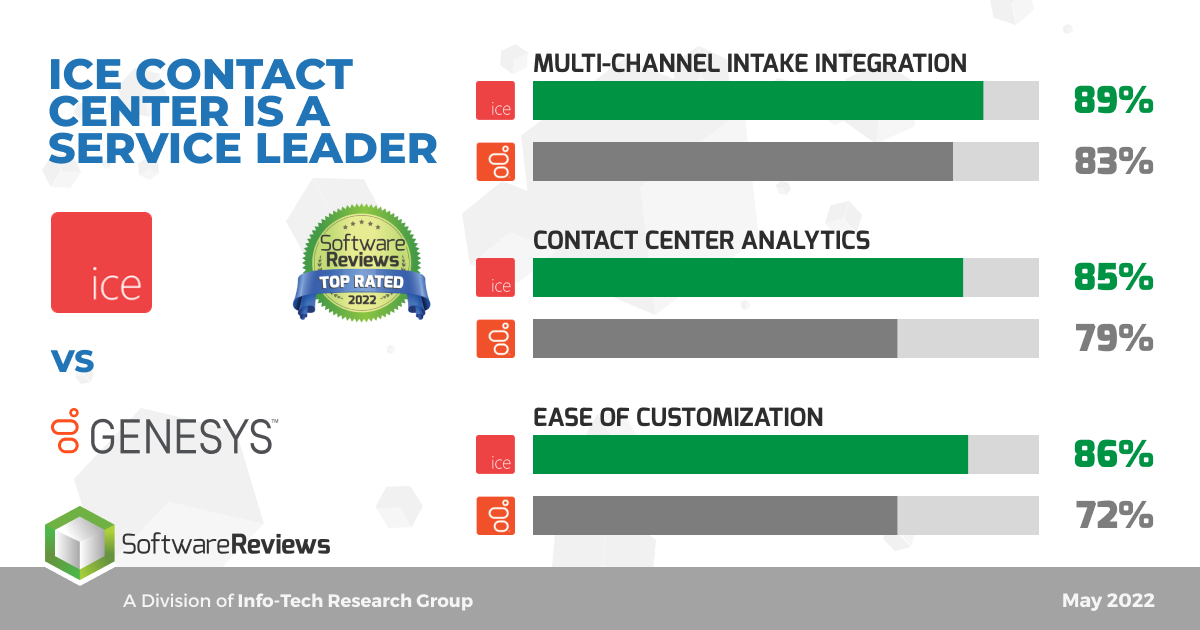 ComputerTalk is pleased to announce that we have been scored as a leader against Genesys in the InfoTech Research Group’s SoftwareReviews.
 Creating a memorable customer service experience begins with following best practices. By consistently prioritizing empathy, responsiveness, and effective communication, businesses can leave a lasting impression on their customers.

